How to Create Tables in WordPress Posts, Did you know you can include WordPress tables in your posts and pages? Tables are extremely beneficial for presenting information in an easy-to-read fashion. Previously, only way to use tables in WordPress was to code them or require a plugin, but this has recently changed.
Here in this blog we are going to discuss two methods of creating table in wordpress post in details both are created with the help of plugins.
Using tables in WordPress articles can be an important tool for displaying data in an organized and straightforward manner. Tables, whether used to share a price list, a comparison chart, or any other tabular data, may make your content more interesting and understandable. In this tutorial, we will walk you through the process of inserting tables into WordPress posts using a WordPress table plugin.
Also Read out : How to Create a Table of Contents in WordPress
Why Add A Table in WordPress?
A table allows you to display essential data in an easily readable fashion. This is why many different websites use them. One of the most effective applications of a table is to display pricing alternatives. The majority of goods come in several versions. Each has special features and an individual pricing point. This can be immediately arranged in a table.
Tables can be used in a variety of ways in WordPress, but keep in mind that too many tables might be overwhelming.
How to Create Tables in WordPress Posts Requirements Table
Before we dive into the steps, let’s outline what you’ll need:
- A WordPress website
- Access to the WordPress admin dashboard
- A WordPress table plugin (we’ll use TablePress and rankmath for this tutorial)
Steps to Create Tables in WordPress Posts
1. Install and Activate TablePress Plugin
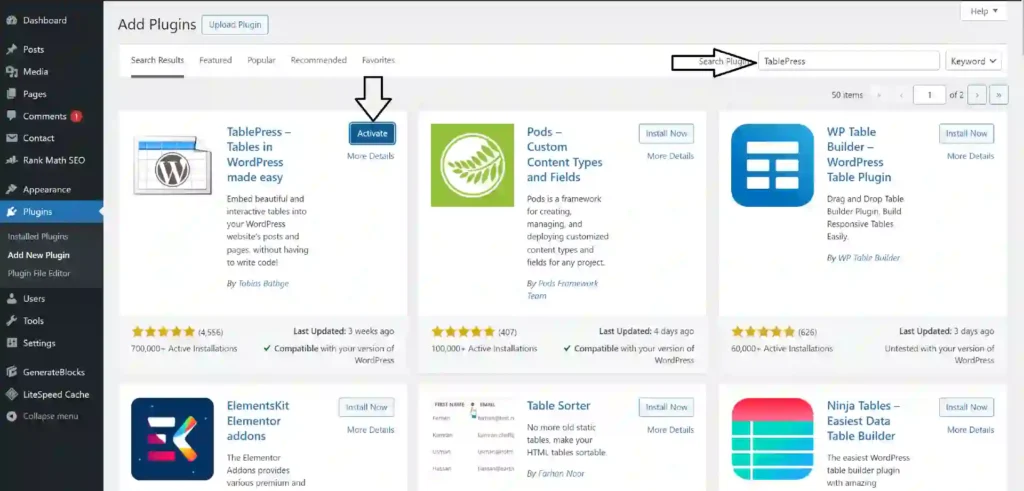
First, you’ll need to install and activate the TablePress plugin. Follow these steps:
- Go to your WordPress admin dashboard.
- Navigate to Plugins > Add New.
- In the search bar, type “TablePress”.
- Click Install Now next to the TablePress plugin.
- Once installed, click Activate.
2. Create a New Table
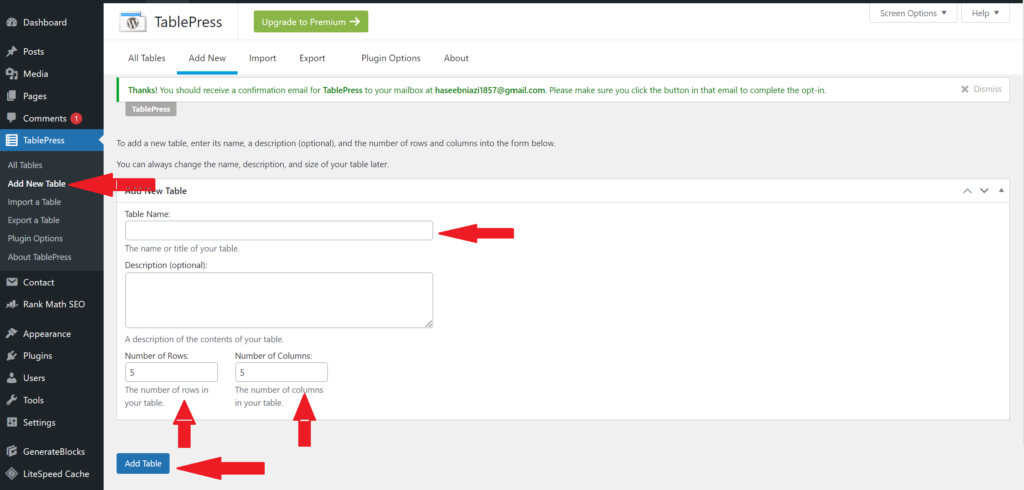
Now that the plugin is activated, you can create a new table:
- Go to TablePress in the WordPress admin menu.
- Click on Add New Table.
- Enter a name for your table and specify the number of rows and columns.
- Click Add Table.
3. Add Data to Your Table
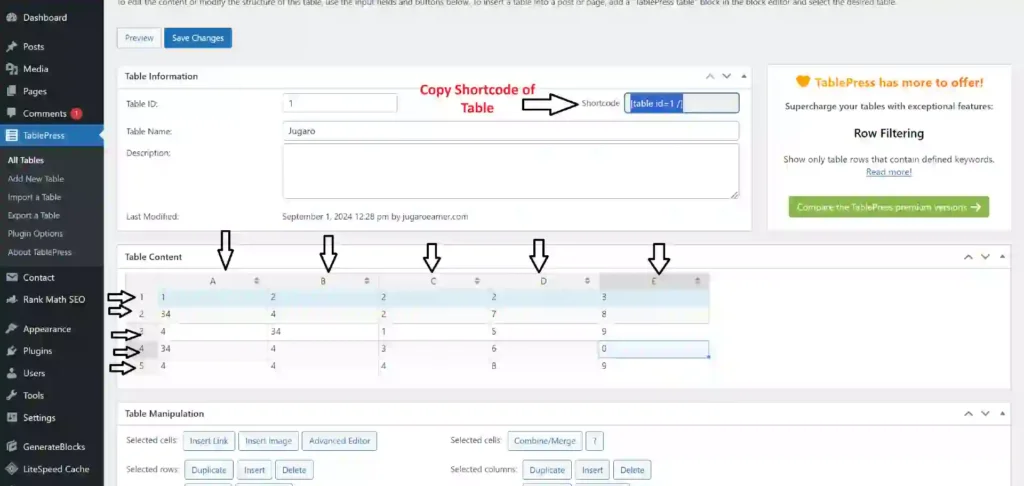
With your table created, it’s time to add data:
- Click on the table name you just created.
- Enter your data into the cells.
- You can also use the options to merge cells, add links, and format text.
4. Insert the Table into a Post
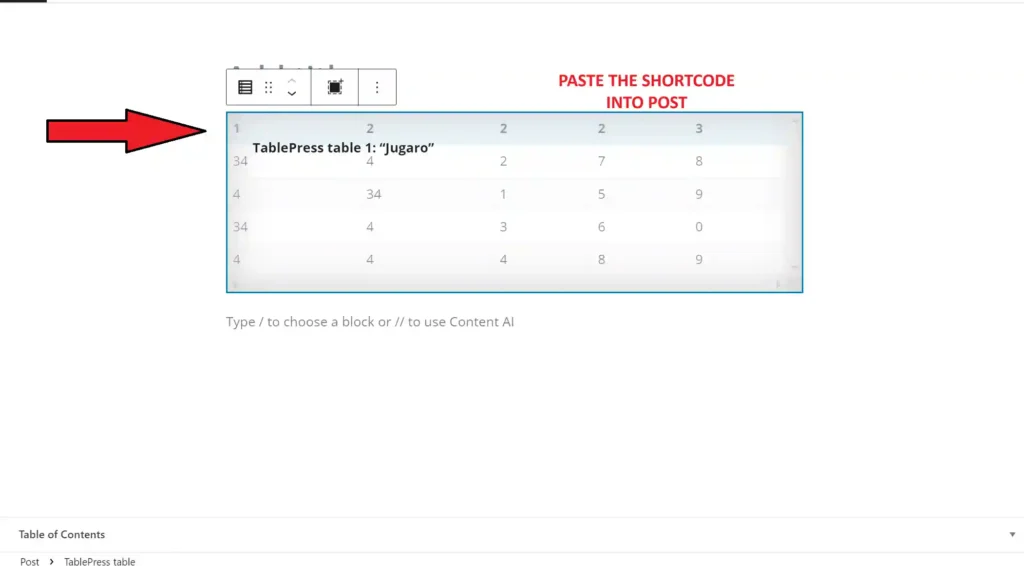
Once your table is ready, you can insert it into a post:
- Edit the post or page where you want to add the table.
- Click on the TablePress button in the editor toolbar.
- Select the table you want to insert and click Insert Shortcode.
5. Publish Your Post
Finally, publish your post to see the table in action:
- Click Publish or Update to save your changes.
- View your post to ensure the table appears as expected.
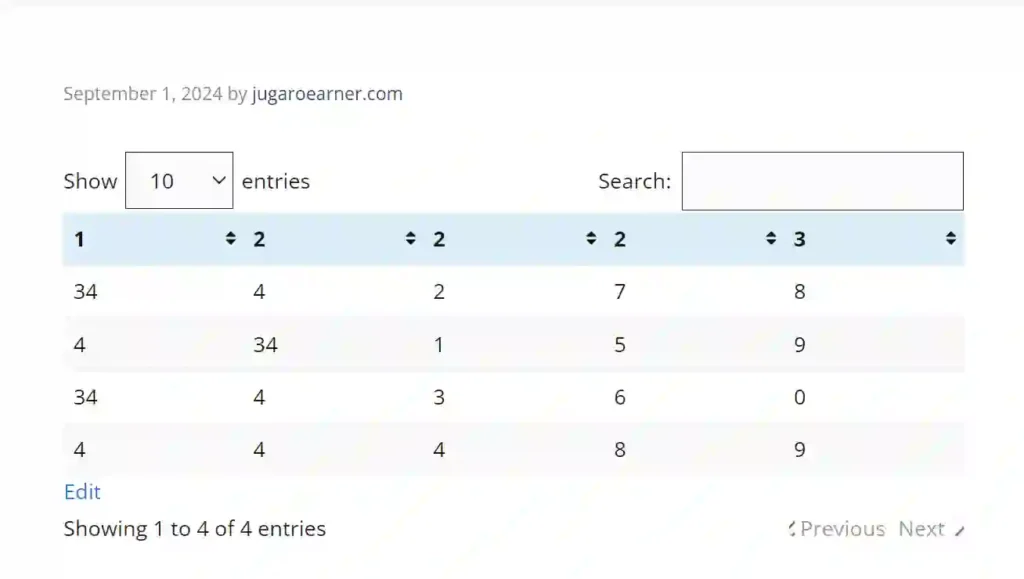
Method 2 : Creating Table in WordPress Posts
1. Install and Activate Rankmath Plugin
- Go to your WordPress admin dashboard.
- Navigate to Plugins > Add New.
- In the search bar, type “Rankmath”.
- Click Install Now next to the TablePress plugin.
- Once installed, click Activate.
2. Create a New Post and Add table
- Click on Add a new post
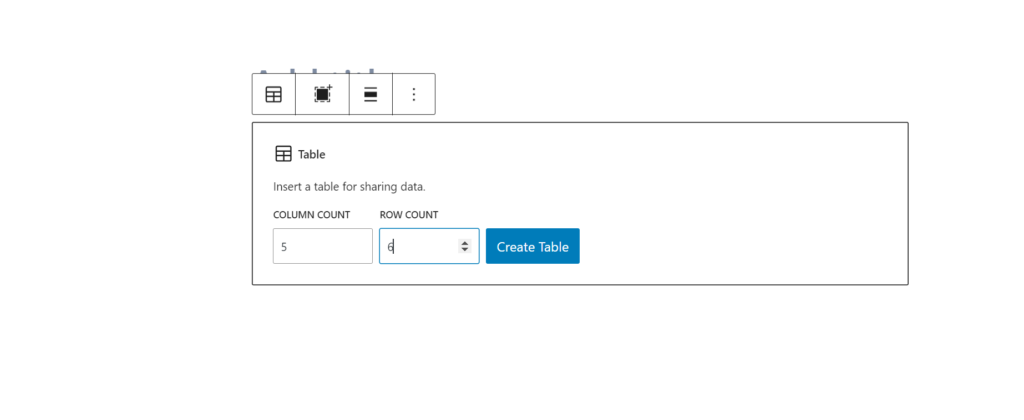
- now Press ‘/’ means write /table and press Enter Button
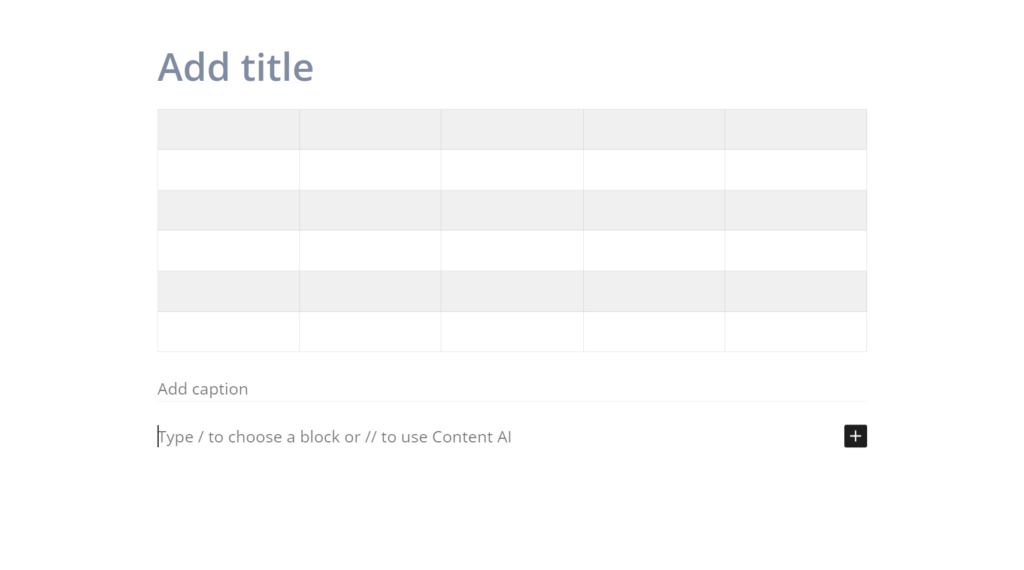
- Now add the Number of rows and columns of your choice
- and click on create and simple enter the data you want

Conclusion
Creating tables in WordPress posts is very easy with the help of a WordPress table plugin like TablePress and Rankmeth. By following these simple steps, you can enhance your content and make it more informative for your readers so users can easily catch the main points of your content and this technique can also increase your site average Click through Rate (CTR).